Tips on homemade facemask from fabric with/without sewing
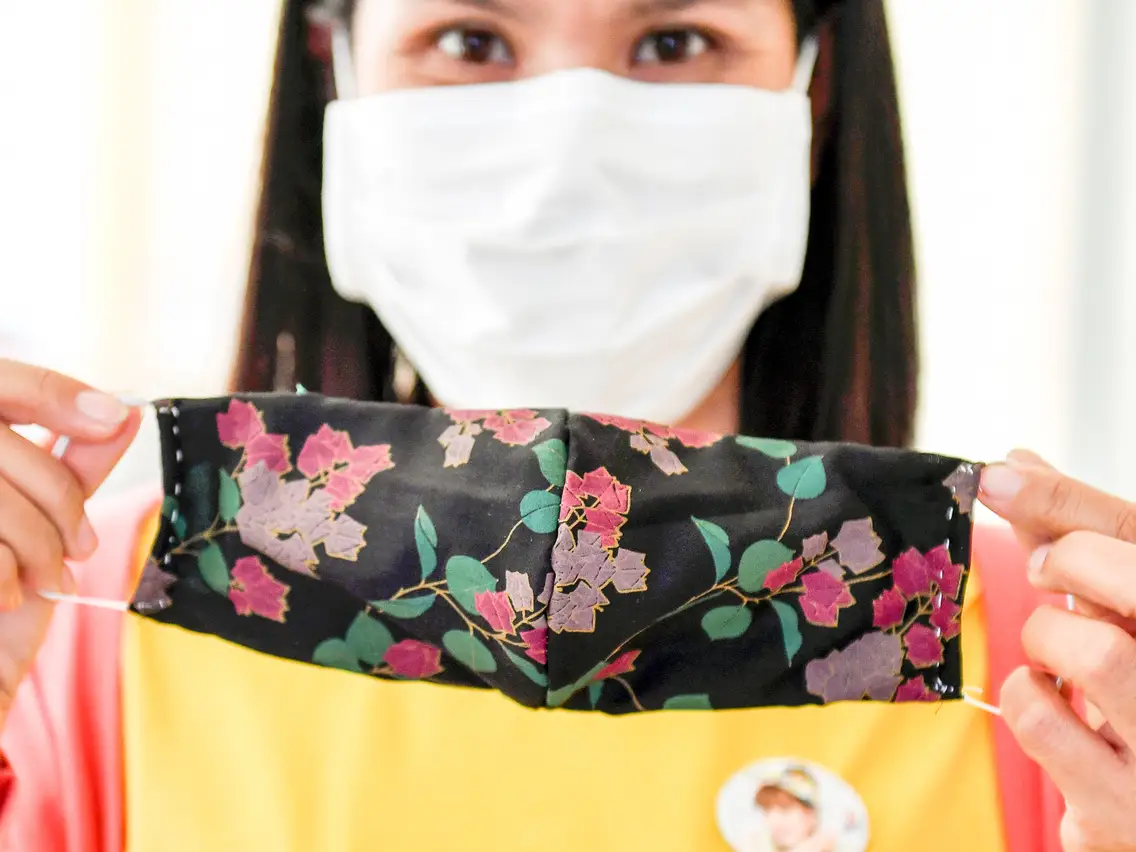 |
| Illustrative photo. |
Depending on your method, you might need some or all of the following:
• Fabric
• Scissors
• Needle and thread
• Sewing machine (if you have one)
• Rubber band or elastics
• Ruler
Fabric
• The ideal fabric is tightly woven 100% cotton
• Try to avoid anything with too much stretch
• In a pinch, if you don't have cotton, you can use pillowcases, tea towels, thick T-shirts or vacuum bags
• Scarves and bandannas also work
How to make a mask with fabric without sewing:
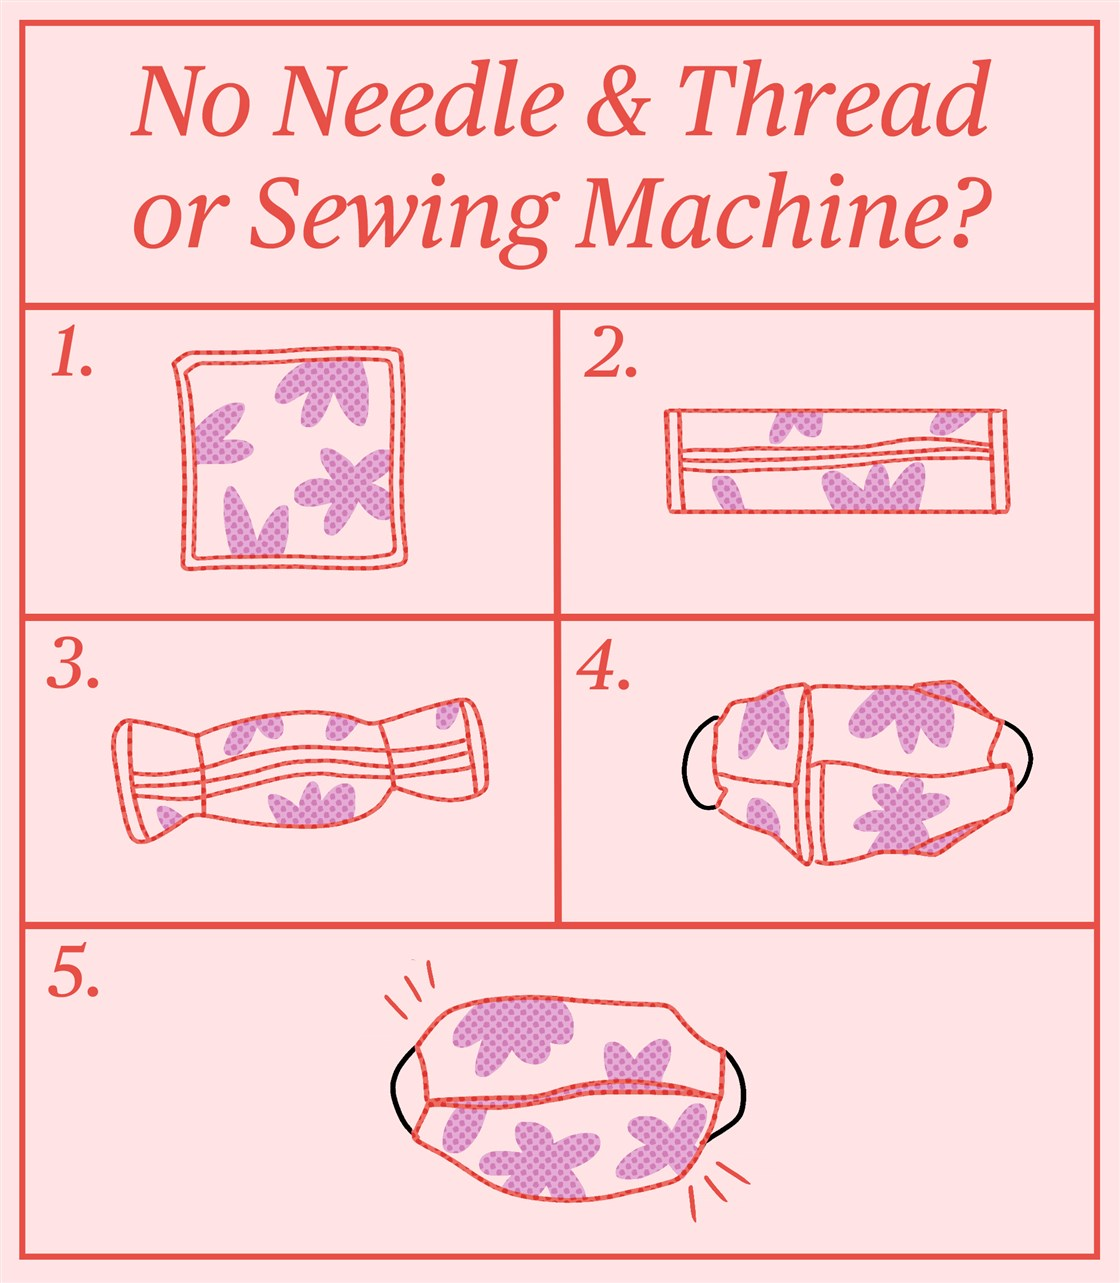 |
1. Use a square scarf or a cut a large square out of a T-shirt (at least 20 inches by 20 inches).
2. Fold two sides of the square in to meet each other in the middle then fold this in half lengthwise. You should be left with a long rectangle with the edges sandwiched inside.
3. Grab two hair ties (or rubber bands) and pull one around each end of the long rectangle, roughly breaking the rectangle into thirds. (It should almost look like a candy wrapper.)
4. Fold each outside third of fabric into the center.
5. Pull the mask on by fitting the hair elastic around ears and making sure the end tails of fabric are against your face so the mask stays put.
How to make a face mask with fabric using needle and thread:
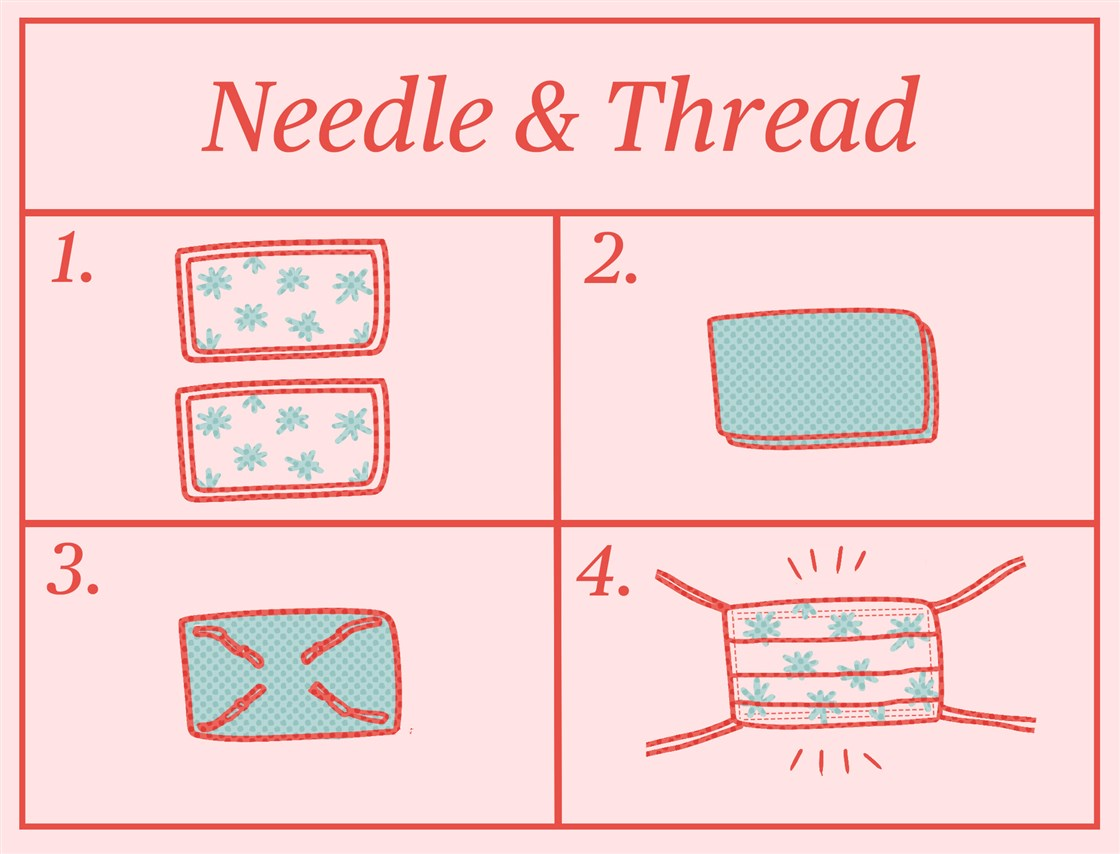 |
1. Cut two pieces of fabric that are equally sized (measure your face to see how wide/long you need them to be).
2. Take the two layers of your 100% cotton fabric or substitute. If you're working with patterns, face the two sides together (like you're making a sandwich).
3. Place the elastic or ties (*see instructions below) in between the layers and sew them into the corner. For elastics, sew one at each end so it creates a loop on each side. For ties, use one piece at each corner so there are four total.
4. Make three staggered pleats lengthwise on the mask, as if folding a paper fan. Then sew all the way around. This will make a rectangular mask.
How to make a face mask with fabric using a sewing machine:
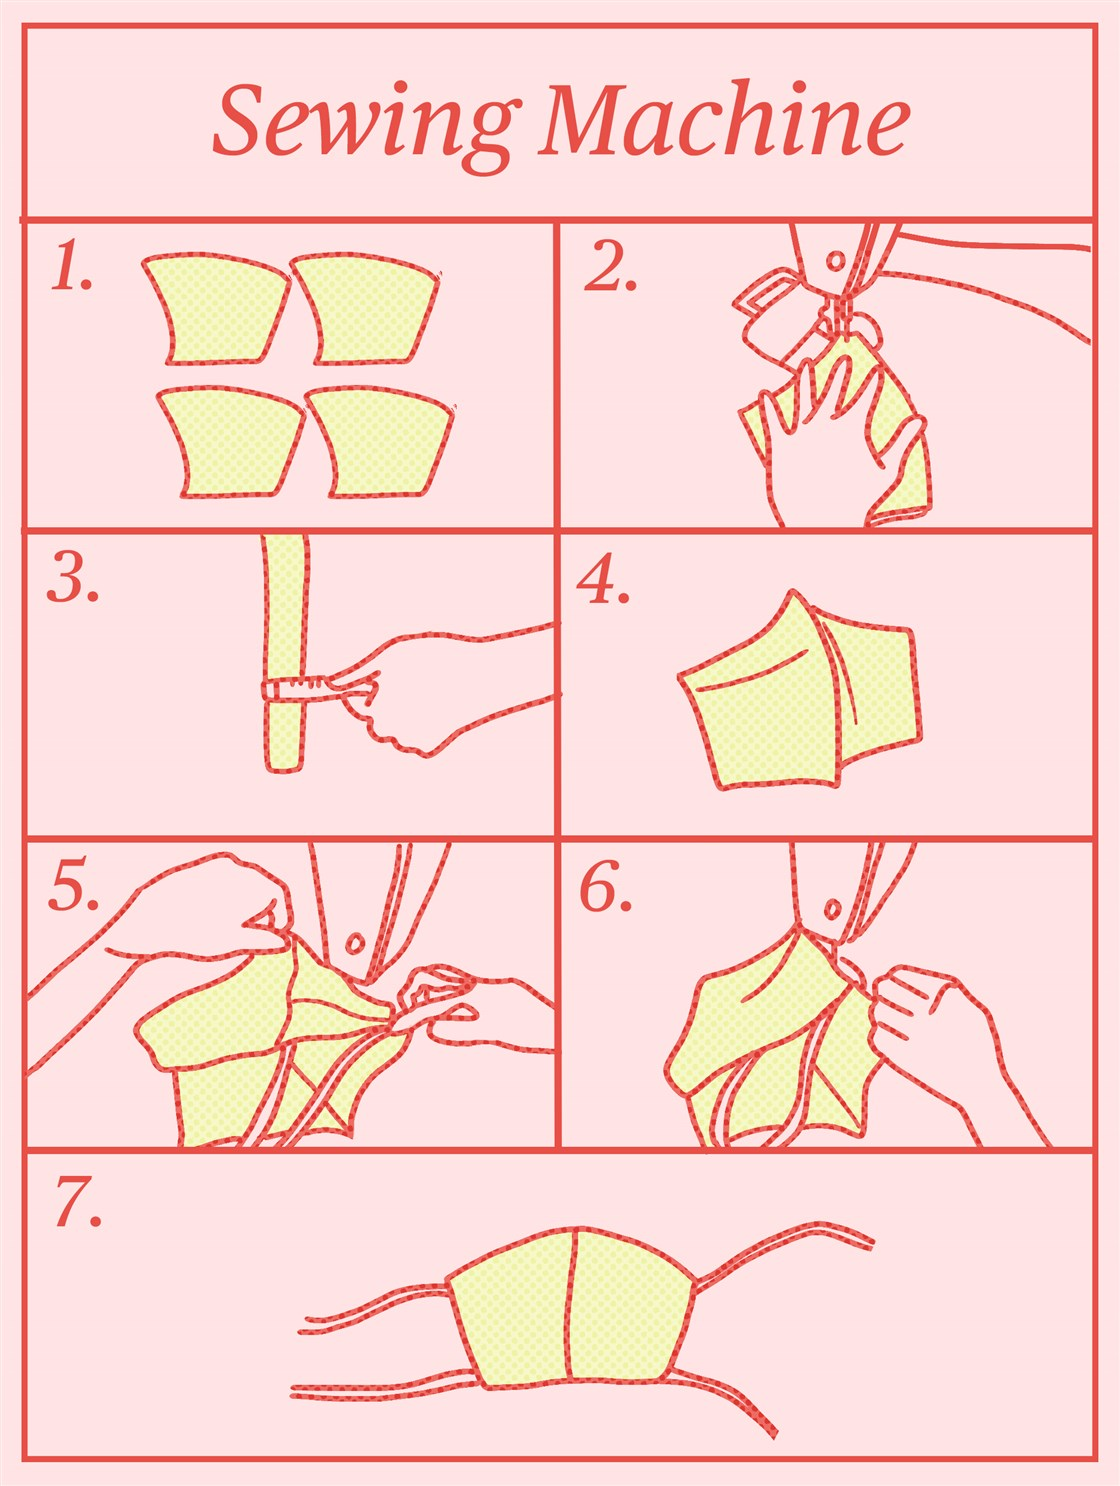 |
1. Cut four pieces of fabric that are equally sized (measure your face to see how wide/long you need them to be).
2. Pair up two of the four pieces together so they are symmetrical. Sew the center seams (curved part that covers your nose) together. Repeat with the remaining two pieces.
3. Get your ties ready (*see instructions below). Take one tie from the 11-inch piece and one from the 9.5-inch piece. The longer piece will go on the top of the mask (where it would touch your nose) and the shorter will go on the bottom.
4. Place the two sewn pieces of fabric on top of each other (like a sandwich) so they're symmetrical. Place ties on the corners of one side of the mask. They should meet the edge of the mask and then go inside of the mask.
5. On the edge of the mask, you should see the following: one layer of mask, the ribbon/tie and another layer of mask. Sew the edges so they are all sewn together.
6. Next, repeat this step for the other side with your remaining ties, making sure to pair ties up so they're the same length and are symmetrical on both sides. Sew around the mask but keep one side open so you can turn the mask inside out.
7. Turn it inside out and sew the gap closed.
| *How to make elastics for your mask: 1. To make your elastics, you can use ribbon or more of the fabric you're using for the mask. 2. You will roughly need one 11-inch and one 9.5-inch long strip of fabric, both of which are 1 inch in width. 3. Cut the two strips in half and place them aside (follow sewing instructions for the mask above). |
In topics
 Friendship
Vietnam welcomes progress towards election organisation in Palestine
Recommended
 World
World
Pakistan NCRC report explores emerging child rights issues
 World
World
"India has right to defend herself against terror," says German Foreign Minister, endorses Op Sindoor
 World
World
‘We stand with India’: Japan, UAE back New Delhi over its global outreach against terror
 World
World
'Action Was Entirely Justifiable': Former US NSA John Bolton Backs India's Right After Pahalgam Attack
Popular article
 World
World
US, China Conclude Trade Talks with Positive Outcome
 World
World
Nifty, Sensex jumped more than 2% in opening as India-Pakistan tensions ease
 World
World
Easing of US-China Tariffs: Markets React Positively, Experts Remain Cautious
 World
World

